Showing posts with label Seasonal Decorating. Show all posts

Wednesday, April 2, 2014

Spring Easter Table Decor

This year we went for simple and easy for the Easter Table.
Easter is always a tricky holiday in our family.
Trying to squeeze in the morning egg and basket hunt, getting ready for church, then coming home with hardly enough time to put the holiday meal on the table...while still trying to make it festive, keep it tidy for the coming guests, and prepare for the afternoon egg hunt outside.
So I am always looking for ways to make this day a touch easier and I started with the table setting.

We had white table linens with burlap overlays. Candles and wood crates for centerpieces. And the place settings were a simple page from a book with a DOLLAR STORE decoration at each.
Simple, clean and quick.
I should have taken better pictures, but in the rush of the day, I hardly got any.
Happy Easter!

Tuesday, May 1, 2012

Free Printable United States Declaration of Independence

With Memorial Day and the 4th of July coming up I have began some Patriotic Projects.
So here is the first, some Patriotic Wall Art.
A free Printable of the United States Declaration of Independence.
Dark & Light, both are 8x10's, but saved at high resolution so they can be printed larger.

 (click on the image then save to computer)


Linked to: Tip Junkie

keywords: fourth of July decorations, free fourth of July downloads & printables, free declaration of independence printable & picture, Memorial Day, Patriotic Art, free wall art

Sunday, January 29, 2012

Valentine's Day Decorations and Projects

I love Valentine's Day! 
And since the day the Christmas Decorations came down, Valentine's Day started going up.
This year I went with a more vintage feel.
My husband first thought the red, white, and black theme was vampire"ish",
but once it was all put together he came around.
These decorations were inexpensive and made from things on hand.

I tore off the covers of some old books and tied them with a ribbon.
Used several pages sliced in half, crunched, and stitched/gathered into a garland. (dyi: here.)
Pages were also used to fan into hearts and circles.
Left over tea-dyed coffee filters from this project, were used to make the big puff balls. (diy: here.)
And scraps of paper for this cute Valentines Day Advent Calendar from Creative Juices (diy: here.)
I printed off some cute vintage images from The Graphic Fairy.
Painted some wood block 4x4's and stenciled LOVE on them. (diy: here.)
And used some marshmallows and candy to fill my jars.
The Letters for my banner and other banners are printable below.
All super simple and super inexpensive.

Images for these are all printable below, just glue onto scrapbook paper.

Banners for "LOVE", "VALENTINE", and "XOXO" free printables below:
And Printable Sheet with Images from The Graphic Fairy.
Click to enlarge then save or print.


Linked to: Tip Junkie

Valentine's Day Advent Calendar

This Advent Calendar is made using a cupcake pan. I found the idea over at Your Creative Juices.
What I really like about it...the little squares of paper have magnets on the back.
 So when the holiday is over, you pull them off and they take no room to store.
And it can be used year after year.
Your Creative Juices also provides a free printable for the numbers, but since I have a black, white, and red theme this year I didn't want any pink.  So I ended up make my own. You can print them off below.  Or go over to her site and print off her cute numbers. 


Printable Valentine's Day Advent Calendar Numbers:
 click to enlarge and print

Book Pages into Garland

Valentine's Day Garland

This project is pretty self explanatory.
I ripped out some old pages from a book and cut them in half the long way. 
 Then using 2 or 3 stacked, I gathered/folded them as I stitched.
Then separate the layers and crunch as you go.  They may tear a bit, but it doesn't matter.
Simple and inexpensive.

LOVE Wood Blocks

More Valentine's Day Decorations...
Materials:
4x4 wood board
Black Paint
White Paint
Sponge Brush
Sand Paper
Stencils (Printable Below)

I made these with scrap pieces of wood from some previous projects.
But it is just made from a 4x4 cut in increments of 6",7", 8" & 9". They do not have to be exact or straight.
 (And, if you don't have a saw to cut wood, Home Depot and Lowes will cut it for free.)
Then paint black. Let dry.
Using printable "LOVE" stencil below,sponge/paint on white lettering. Let Dry.
Sand and Distress corners.

Printable LOVE Lettering: here
linked to: Tip Junkie

Coffee Filter Puff Balls

I have been working on my Valentine's Day decorations...and these are one of my favorite.
I actually made these will left over dyed coffee filters from my wreath project found: here.

Materials:
20-30 coffee filters (per puff ball)
Water and Tea bags
Nail
Brad (one per puff ball)
Ribbon

  Make a pot of tea, soak coffee filters in them, then dry out.
Then stack 20-30 filters. Push a nail through the center of all, creating a hole.
Insert a brad to secure. Pinch and crunch each filter one at a time, working your way to the center.
Repeat on opposite side. And add some ribbon to hang and you're done!

Linked to: Tip Junkie

Thursday, December 8, 2011

Knock off Christmas Light Post

I saw this light post at Hobby Lobby decorated with greenery, berries and a bow...and loved it.
But the price tag was really high, $93 with tax.  So I decided to look around and it was worth it.

The entire Christmas Light Post was just under $22.50, including tax.

Saturday, November 26, 2011

Thanksgiving Leftovers

So there are always left overs and initially I love making the traditional Turkey Sandwich with cream cheese, cranberry sauce, and gravy on homemade rolls.  But after that, left overs get a little old.  So here are a few of my favorite recipes that use Thanksgiving Left Overs.

Here are tons of recipes from Rachel Ray.
Recipes found: here
And another by Rachel Ray found: here
Turkey, Cheese, and Pasta Wheels

I like that their is more than just Turkey Casserole, where you still feel like it's the same thing.  There's Turkey and Rice recipes, Soups, Enchiladas, etc.

And when I just need something on the fresh side I like,
Turkey Salad with Cranberries found: here

Chunky Turkey Salad with Cranberries and Walnuts

*I also freeze left overs and I like to make stock and freeze it in ice cube trays.  9 ice cubes equals 1 cup.
Key words: Turkey leftovers, Thanksgiving leftovers, Turkey leftovers recipes, Thanksgiving leftovers recipes.

Friday, November 25, 2011

Season Crate


I love this crate...my dad and husband made if for me years ago on a whim and I still use it constantly.
I exchange Christmas tree clippings with berries, pine cones, and candles, for wheat grass and eggs in the spring. Summer I use wheat grass with pails, flags, flowers, and 4th of July decor.  Then in the fall twigs, leaves, gourds and pine cones. Or any other ideas I come up with.

How it was made...
10: 3 ft x 1.5 inch strips of wood.
5: for the base, two for each long side
1: cut into four, 9 inch strips, two for each short side.
Simply Nail together on each short end board.

Tuesday, November 22, 2011

Fall Wreath from Coffee Filters


As I was taking this wreath down, I realized I never posted the making of it.
And my photo really washes the color out...and the crazy wind removed a few of my branches and berries, but after the few months on my door, I still love it. 

Plus it was super simple and inexpensive.

Materials:
floral foam wreath
Coffee Filters (300 pack from dollar store)
Tea Bags (about 50, also from dollar store)
Hot glue gun
Ribbon, twigs, berries, etc as desired

Directions:
1. Preheat oven to 450' F.  Fill large pot or bowl with hot water and dump in 50 tea bags.  Let sit for 15 min. Then stir and squish them getting the water as dark as possible.
2. Drop in approx. 50 coffee filters.  Separate before putting them in tea. Stir around, add another 50 and repeat.
3. Wring out coffee filters and spread out on cookie sheet.  Place in hot oven to dry. Bake approx. 15 min. or until dry.
4. While they are in the oven, repeat step 2.
5. Continue through all of the filters.
6. Glue a ribbon on foam wreath for hanging purposes.
7. Once dry, pinch center of each coffee filter and glue to wreath.  Place them pretty close together and securely glue them. Don't worry about putting them on the back.
8. After gluing all filters on, glue on ribbon and decorations.

Monday, October 10, 2011

Fall Jars


Filling Apothecary Jars.
Nothing brilliant or super creative here, but just a simple tip...
Use a drinking glass placed upside down in the center of the jar.
This takes up space and you don't see it.
Less Candy Corn needed, more money saved and less to store.

*I also save my candy corn and reuse it each year.
No, we never eat it...but saves money and effort on my part.

Sunday, October 9, 2011

Book Pumpkins


So I saw this cute idea from Craftberry Bush and fell in love with it.
Whether it is the love for books, or the soft look they give on the traditional pumpkin...
I don't know but I loved them. So I made my own.

I did mine a little different than Craftberry Bush explained, but still very easy.

Materials:
-Old Book
-Tea
-Stick
-Ribbon
-Scissors
-Glue
-Stapler

Instructions:
1. First take an old book (or buy one at good will)
2. Rip off the cover.
3. Trace and cut the cover to make the template for "half" of the pumpkin
4. Cut the edges of the book with scissors, regularly referring to the template.
*I liked cutting thick sections so it roughed up the edges
5. Dip all of the page edges into pot of tea.
6. Glue and/or staple 5-10 of the front and back pages together.
Securing the book into a pumpkin shape.
7. Insert stick with hot glue into the binding.
8. Add Ribbon for the bow.

*I didn't glue mine.  I only stapled the pages and pushed the stick in without glue. 
This way I can easily undo it and store it.

Saturday, October 8, 2011

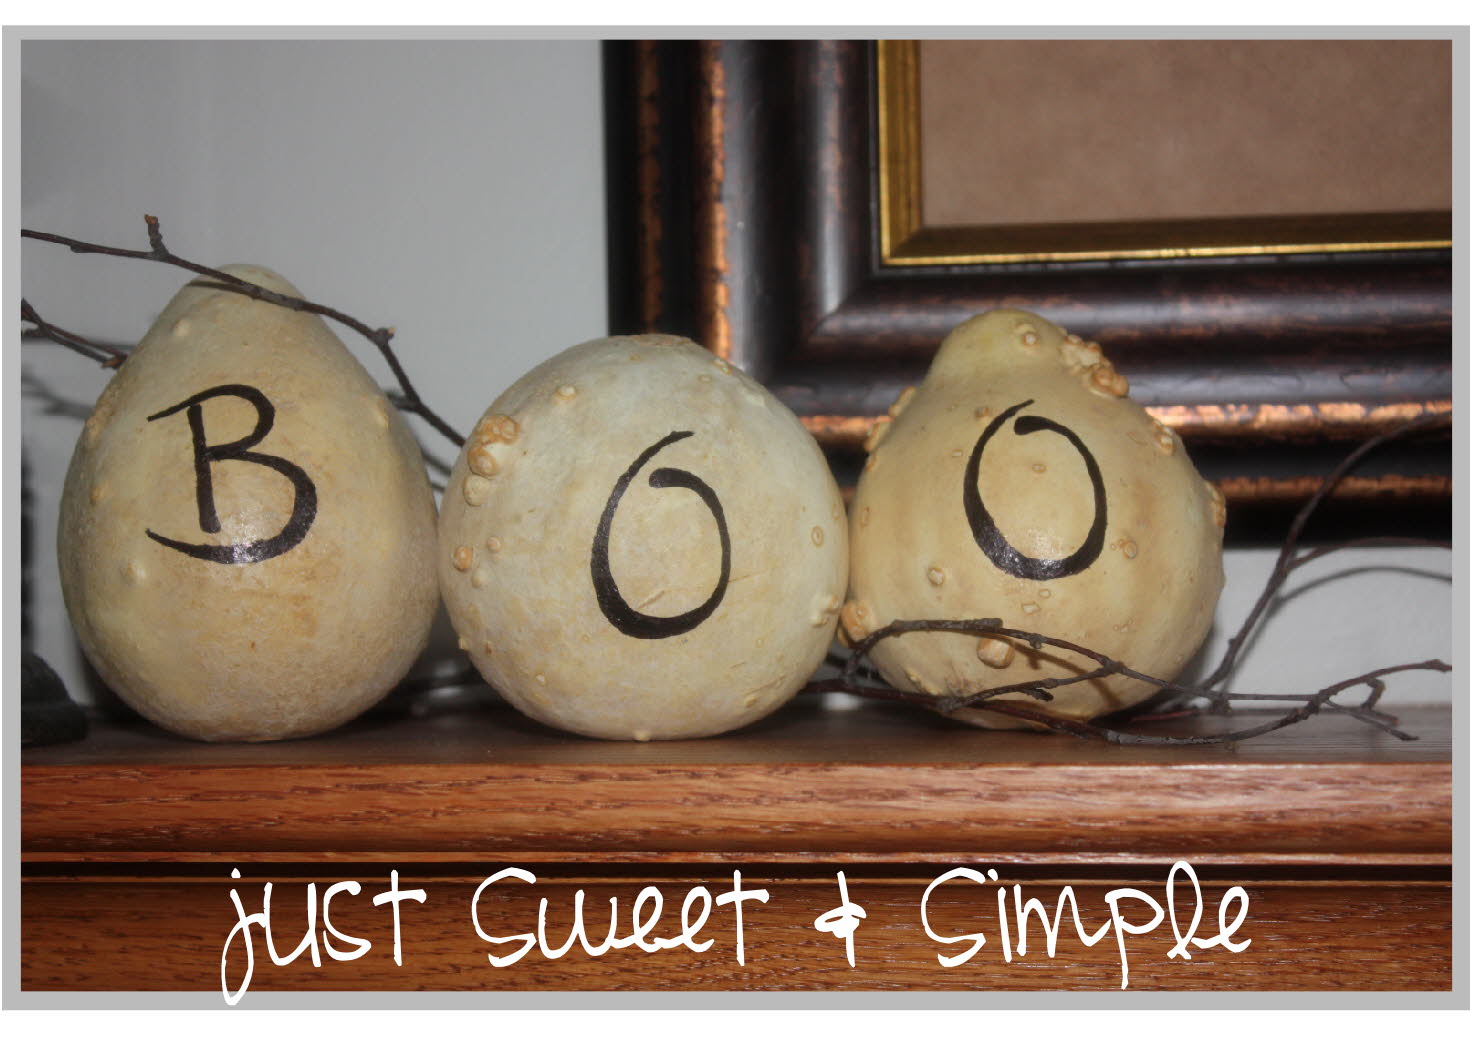
Boo Pumpkins


Simplest project yet.
Some gourds, and a Sharpie.

(The gourds I used are actually from last year.  I just dried them out.)

Saturday, October 1, 2011

Halloween Ideas

I love Holidays and I love Halloween...
So I have been collecting and working on several different ideas for this year.  
Some have been completed but most are still just on my list of to do. 


White Chocolate Covered Cookie Ghosts: here
Cookie Candy Corn:  theidearoom
Ghost Bags: bhg.com
Mummy Candy Jars: Parents.com
Dare You to Eat It: eighteen25


And for the decorations!!!

  Halloween Newspaper signs: deckthehallsofhomewithjoy
  Vintage Halloween Signs: RhonnaDesigns (similarly at Tia Pan)

  Witch Legs: 1.bp (similarly at Tia Pan)
  Vintage Halloween Party: hostessblog
  Pumpkin Spiders: goodhousekeeping
  Candy Corn Pumpkins: bhg.com
  Orange Wreath: etsy.com
  Fall Wagon: bhg.com
  Book Pumpkin: Craftberry bush

Thursday, May 5, 2011

Free Printable Mother's Day Banner

 I just put together a simple Mother's Day Banner...but haven't had time to print and assemble mine. 
So no picture yet.  I will post one soon.

But here is is nice and easy...cut, paste, string, and hang.
Or exchange out the letters and use for any occasion.


Free Download and Printable Found: here

Tuesday, April 5, 2011

Brown Paper Bag Ball


Simple and Cheap to make.  The cutting of the circles can be tedious.  So I used an actual circle cutter to speed the process up.  But you can always trace a circle and cut them the old fashioned way with scissors too.
Also, Tacky Glue or Hot Glue are highly recommended.

Items Needed:
Styrofoam ball
2 brown paper bags
Tacky Glue or Hot Glue
Scissors or Circle Cutter
Ribbon
*Brown Stamp Pad

*Also, I took a brown stamp pad to the edges of my circles right before step three.  This just added a little extra dimension.  But not necessary.


Thursday, March 24, 2011

Printable Spring Banner


Here is a free printable banner. 
To download click here: SPRING BANNER

Comes with "SPRING" banner, "BLOOM" banner, "EASTER" banner (seen above),
& coordinating labels/tags. Enjoy.

LinkWithin

Related Posts Plugin for WordPress, Blogger...