Friday, October 21, 2011

Thanks for voting...Butter Beer Won!

I just want to thank you all for voting for my Butter Beer Blog entry.

It won the Halloween Recipe Hop!
blog hop button October Blog Hop & Giveaway: Favorite Halloween Recipes

Thanks for all your votes and support!
And yes, the Butter Beer is excellent...so try it for Halloween!

Thursday, October 20, 2011

Favorite Halloween Recipe Voting


So I was asked to enter the Butter Beer Recipe, from our Harry Potter Party, on this Halloween Recipe Contest.  I just entered it yesterday, and found out the deadline for voting is tonight.

So, if you liked the Butter Beer Recipe...or just want to show your loyal support, Go Vote!

blog hop button October Blog Hop & Giveaway: Favorite Halloween Recipes
Vote here: RecipeLionBlog 
Scroll Down until you find the Butter Beer Recipe and click the "like" button.

The Story of Booing

This is another one of the many times I should have taken a picture but I forgot.

A year ago I got some goodies and this cute poem from a friend ...
But the picture of the ghost and the typing were really blurry and just a bad copy.
So this year I decided to start this tradition up with our family and I revamped the paper.
These are what I came up with.
I cut out the ghost and the Story separately and attached them to some goodies.
Then we took the boys "ding-dong-ditching".
Although I ended up in the car with a crying baby, our older boy loved it.

So here they are.  I doubled it so you could print two per page.
free download and printable Story of Boo-ing found: here

*The ghost image I found for free at: freedigitalscrapbooking.com

Wednesday, October 19, 2011

Printable Halloween Recipe Cards

With all the fun fall recipes and goodies we have been baking and delivering
I decided to put together some festive recipe cards to share.

free download and printable fall recipe cards found: here

Monday, October 17, 2011

Take Along Car Mat

 Both the Travel Car Mat  and this Car Caddy  have been huge hits with my boys.
So for this last birthday, I combined the two ideas and came up with this Take Along Car Mat.
I like how it only holds 4 cars.  The "Car Caddy" I made held 8...which was bulky and too many to keep track of at restaurants, appointments, etc.  Then the Travel Car Mat, didn't tote the cars along.
So combine the two ideas...and perfection!

Well, I made mine with all the scraps from both previous car mat projects and it was quick and simple...The entire project took less than an hour. And for me cost virtually nothing.

Directions below and printable link at bottom.

Printable Directions found: here & here

Tuesday, October 11, 2011

White Board Calendar


I am all about calendars, planners...anything to keep me organized. But if it is going to be out or seen, I want one that looks cute. And, I like it to be reusable. (Less cost and effort).

So, I took an old picture from a garage sale. Removed the picture, painted the plain oak frame black. 
Used some Scrapbook paper for the background. 
And there you have it...a Calendar, Grocery List, Reminders, Meal Planning, etc...all in one place.

For more information on how I use this calendar for Weekly and Monthly Meal planning click: here

Peach Cinnamon Rolls

These were amazing Cinnamon Rolls and perfect for fall.  We have had so many peaches around which I love.  Then with my love for this peach cupcake frosting, I have been looking for more ways to use both of them.  And I came up with this combination.


Roll out dough. Spread softened butter over dough. Sprinkle with Cinnamon. Mix 3 tbsp of sugar & 3 tbsp of brown sugar in small bowl. Sprinkle all 6 tbsp over the dough. Peal and dice 3-4 peaches, sprinkle over dough. Roll up and slice. Place on buttered pan, spaced 1-2 inches apart.  Cover with towel and let rise until about double in size. (About 45 min to an hour)
Bake for 18-22 min at 350. Let cool until just warm.  Spread this Peach Frosting over buns when warm.

Monday, October 10, 2011

Fall Jars


Filling Apothecary Jars.
Nothing brilliant or super creative here, but just a simple tip...
Use a drinking glass placed upside down in the center of the jar.
This takes up space and you don't see it.
Less Candy Corn needed, more money saved and less to store.

*I also save my candy corn and reuse it each year.
No, we never eat it...but saves money and effort on my part.

Sunday, October 9, 2011

Book Pumpkins


So I saw this cute idea from Craftberry Bush and fell in love with it.
Whether it is the love for books, or the soft look they give on the traditional pumpkin...
I don't know but I loved them. So I made my own.

I did mine a little different than Craftberry Bush explained, but still very easy.

Materials:
-Old Book
-Tea
-Stick
-Ribbon
-Scissors
-Glue
-Stapler

Instructions:
1. First take an old book (or buy one at good will)
2. Rip off the cover.
3. Trace and cut the cover to make the template for "half" of the pumpkin
4. Cut the edges of the book with scissors, regularly referring to the template.
*I liked cutting thick sections so it roughed up the edges
5. Dip all of the page edges into pot of tea.
6. Glue and/or staple 5-10 of the front and back pages together.
Securing the book into a pumpkin shape.
7. Insert stick with hot glue into the binding.
8. Add Ribbon for the bow.

*I didn't glue mine.  I only stapled the pages and pushed the stick in without glue. 
This way I can easily undo it and store it.

Saturday, October 8, 2011

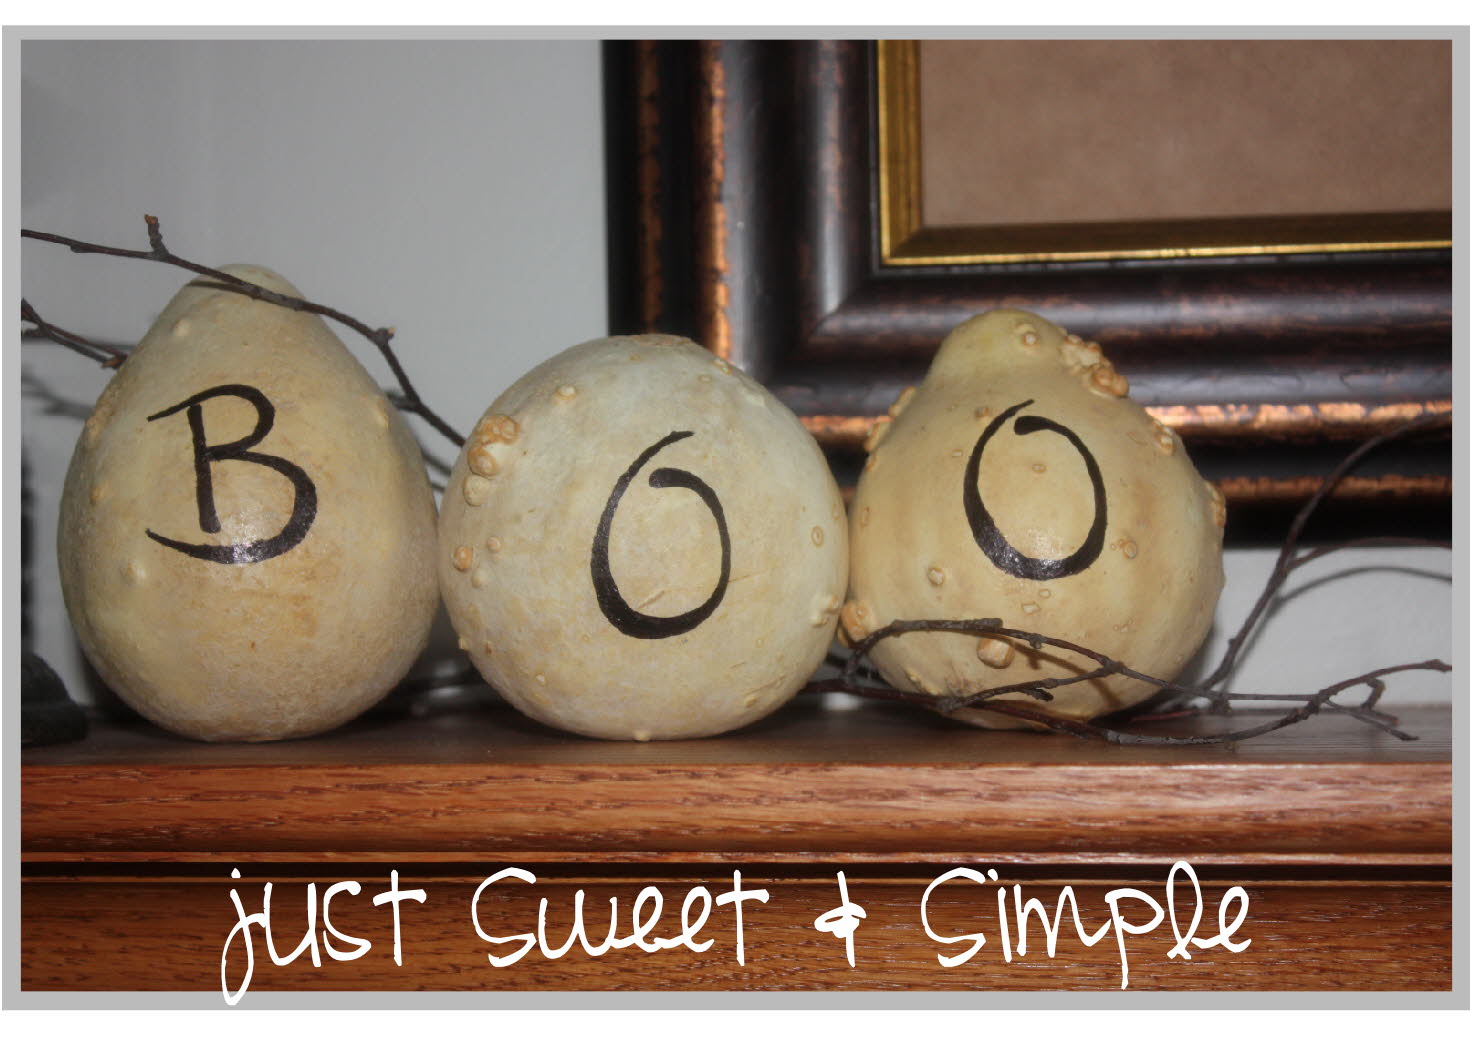
Boo Pumpkins


Simplest project yet.
Some gourds, and a Sharpie.

(The gourds I used are actually from last year.  I just dried them out.)

Saturday, October 1, 2011

Halloween Ideas

I love Holidays and I love Halloween...
So I have been collecting and working on several different ideas for this year.  
Some have been completed but most are still just on my list of to do. 


White Chocolate Covered Cookie Ghosts: here
Cookie Candy Corn:  theidearoom
Ghost Bags: bhg.com
Mummy Candy Jars: Parents.com
Dare You to Eat It: eighteen25


And for the decorations!!!

  Halloween Newspaper signs: deckthehallsofhomewithjoy
  Vintage Halloween Signs: RhonnaDesigns (similarly at Tia Pan)

  Witch Legs: 1.bp (similarly at Tia Pan)
  Vintage Halloween Party: hostessblog
  Pumpkin Spiders: goodhousekeeping
  Candy Corn Pumpkins: bhg.com
  Orange Wreath: etsy.com
  Fall Wagon: bhg.com
  Book Pumpkin: Craftberry bush

Tuesday, September 13, 2011

Coconut Cupcakes

These coconut cupcakes come from the Barefoot Contessa...and are amazing!  Which how much butter they call for, they better be amazing. The original recipe can be found: here

This also makes and amazing cake...or my personal favorite is using this cake batter with the Peach Cream Cheese Frosting recipe found: here!

Cake Batter
3 sticks butter, room temperature
2 c sugar
5 eggs, room temperature
1 ½ tsp vanilla
1 ½ tsp almond extract
3 c flour
1 tsp baking powder
½ tsp baking soda
½ tsp salt
1 c buttermilk
14 ounces coconut
Frosting
1 pound cream cheese at room temperature
3 sticks butter, room temperature
1 tsp pure vanilla
1/2 tsp almond
1 ½ pounds confectioners' sugar

Directions:

With electric mixer & paddle attachment, cream the butter and sugar on high until light and fluffy, about 5 min. With mixer on low, add eggs, one at a time, scraping down after each addition. Add vanilla and almond extract. Mix well.

In separate bowl, sift flower, baking powder, soda, and salt. In 3 parts alternately add the dry ingredients and the buttermilk to the batter, beginning and ending with the dry. Mix until just combined. Fold in 7 ounces of coconut.

Line a muffin pan with paper liners. Fill each liner to the top with batter (I only do ¾ full). Bake for 25 to 35 minutes and 325' F, until the tops are brown and a toothpick comes out clean. Allow to cool in the pan for 15 minutes. Remove to a baking rack and cool completely.

Meanwhile, make the frosting. In the bowl of an electric mixer fitted with the paddle attachment, on low speed, cream together the cream cheese, butter, and vanilla and almond extracts. Add the confectioners' sugar and mix until smooth.

Frost the cupcakes and sprinkle with the remaining coconut.

Peach Cupcakes with Cream Cheese Peach Frosting

{via}

I found an amazing recipe for these at: Week of Menus
Adapted a few things, since peaches were in season and fell in love with these cupcakes.

Ingredients:

Batter
1 cup (2 sticks) unsalted butter, softened
2 ⅔ cups all-purpose flour
2 ½ teaspoons baking powder
1/2 teaspoon salt 2 cups granulated sugar
3 large eggs
3/4 c. very finely diced peaches
3/4 cup low-fat buttermilk
1/2 cup pureed fresh peach
1 teaspoon pure vanilla extract

Frosting
1 cup of butter, softened
8 oz of cream cheese, softened
1/3 c. very finely diced peaches
1/3 c pureed peach
1 teaspoon vanilla extract
3-5 cups of confectioners sugar

Directions:

Mix together flour, baking powder, and salt. Set aside. In a large measuring cup or bowl, mix together buttermilk, peach puree and vanilla extract. Set aside until needed.Using an electric mixer, beat butter and granulated sugar in a mixing bowl until pale, about 2 minutes. Add eggs one at a time, mixing well after each addition. Mix in peaches.
Mix in flour mixture in three batches, alternating with two batches of buttermilk mixture. Mix until just combined, scraping down bowl as needed. Scoop batter into lined cupcake tins.

Bake at 350' F, until golden brown and a toothpick inserted into center of cake comes out clean, about 21 to 24 minutes. Allow cupcakes to cool in tins for 10 minutes, and then remove cupcakes and place them on a cooling rack. Makes about 24-28 cupcakes.

To make frosting: In a large mixing bowl, mix butter until it is softened and uniform. Add cream cheese and beat together until it is uniform. Add vanilla extract and mix. Add peaches and peach puree and mix. Add 3 cups of sugar to the mixture and mix. Add more sugar if necessary. Mix again until mixture is creamy and spreadable. Add more sugar if necessary.
 
* I also made this in cake form...which was delicious. 
*Also, using the frosting above and the cake from Coconut Cupcakes found: here
   it made an amazing, cake!

Shellac Nails

After 3 weeks...I didn't even think to take a picture at the beginning.
Excuse my funny shaped toes, but I wanted to show these nails. After 3 weeks, they are flawless.  The only exception being the grow out at my cuticles.

I love nice nails, but I don't love paying for pedicures. Especially on my hands, where nail polish chips with in days or even hours. But after a sweet mother's day gift from my husband, I got to go have a shellac manicure for both my hands and feet. And I have never been as impressed.

 I chose color for my toes, shown above and a french manicure for my hands. They lasted well past the 2 weeks they promised. In fact, I removed my fingers' paint only because they grew out to the point you could see the whites of my own nails coming through. And I wasn't careful with them, I just did things as usual. And things that would cause chipping immediately with normal polish didn't do anything to these.

My toes were able to last longer since they were a color.  I just made sure not to push back my cuticles...postponing the grown out look as long as possible. And, I clipped my nails as they grew, so they weren't too long...and it didn't chip polish.  It kept them looking fresh.

So...in a nutshell, I highly recommend them.
So much, in fact, that I am looking into purchasing the equipment and supplies to do it myself. I'll keep you posted.

LinkWithin

Related Posts Plugin for WordPress, Blogger...